


VPN Server (WireGuard)
Establishing secure and private remote access to a home network.
1. Project Overview & Problem Solved
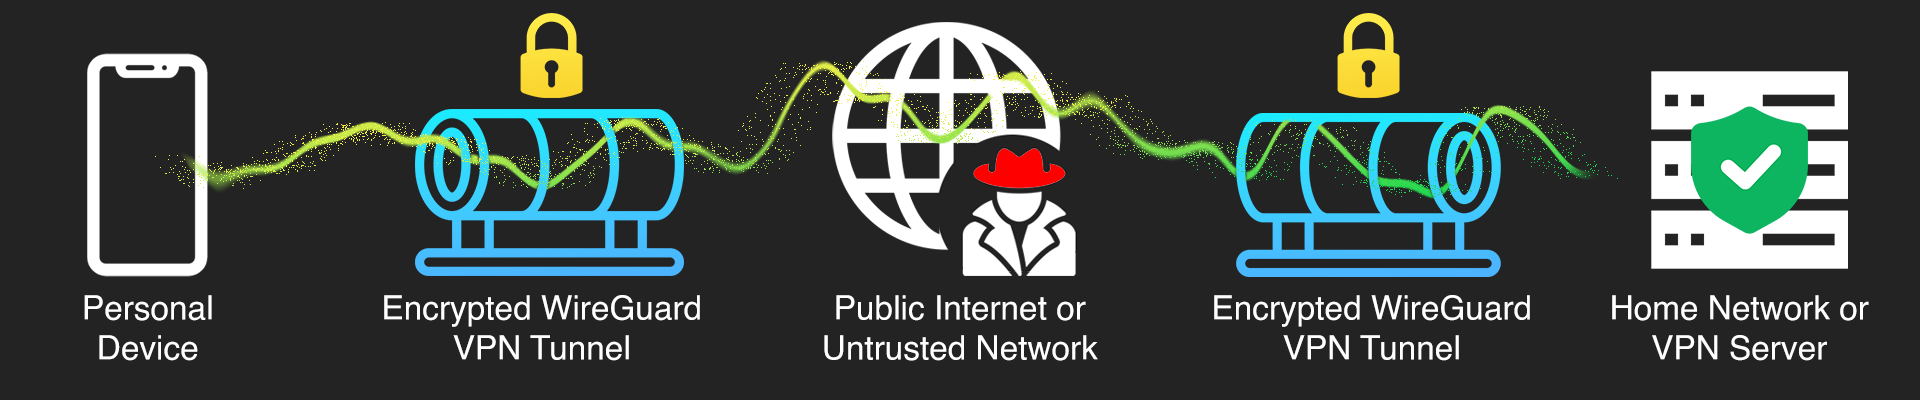
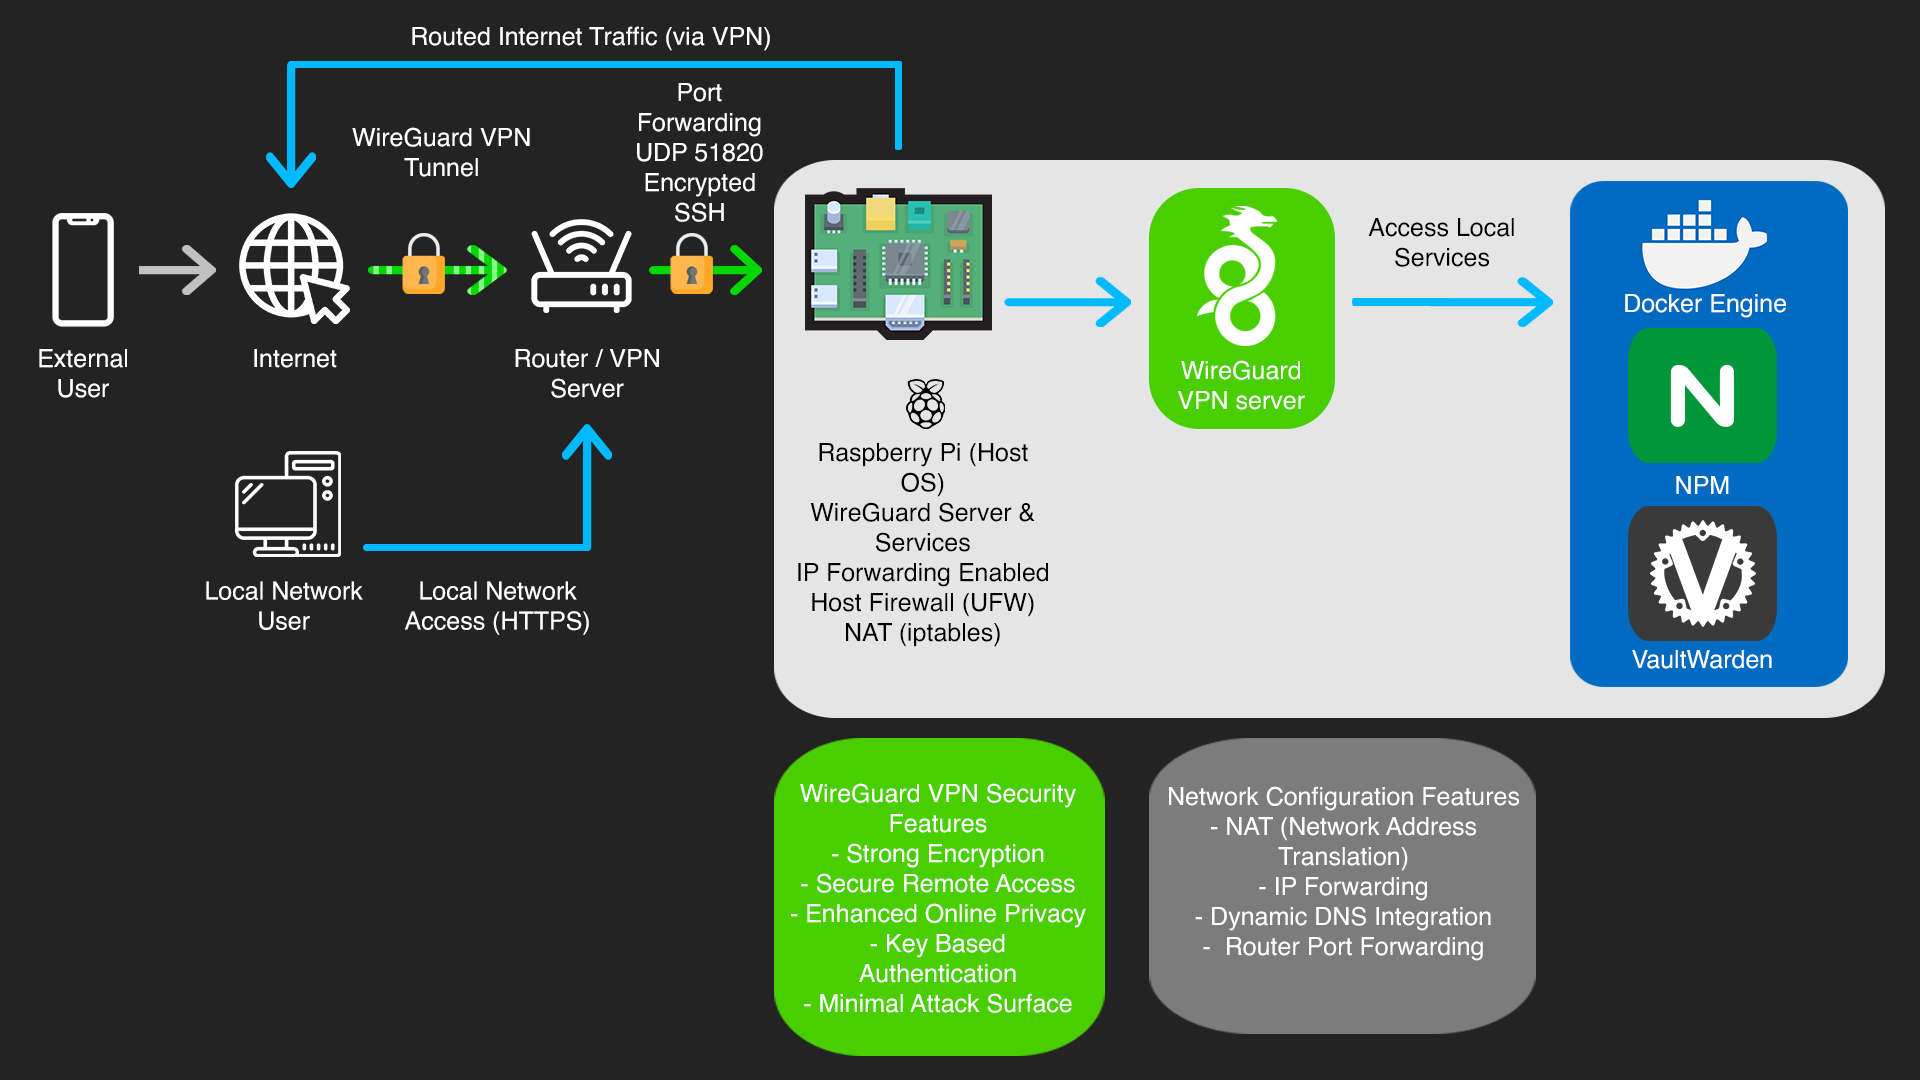
I built a personal VPN server on a Raspberry Pi using WireGuard. The idea came from wanting a way to browse securely on public Wi-Fi and access my home network remotely, specifically my self-hosted Vaultwarden password manager, without exposing it directly to the internet. Rather than paying for a commercial VPN and trusting a third party, I wanted to own the whole setup.
2. Key Technologies & Tools Used
• Hardware: Raspberry Pi (e.g., 4B 4GB), SD Card
• Operating System: Raspberry Pi OS Lite (64-bit)
• VPN Software: WireGuard
• Networking: iptables (for routing/NAT), UDP Port 51820
• Dynamic DNS: DuckDNS
• Remote Access: SSH (Secure Shell)
• Clients: Official WireGuard mobile apps (iOS), WireGuard desktop clients (Linux, Windows, macOS)
• Command Line Tools: wg (WireGuard command-line utility), iptables, nano, ssh
3. Goals & Features Implemented
• Strong Encryption & Tunnelling: Implemented WireGuard, which utilizes modern cryptographic primitives (eg ChaCha20 for encryption, Poly1305 for authentication) to establish highly secure and efficient VPN tunnels for all transmitted data.
• Secure Remote Access: All connections to my home network from outside are encrypted, meaning no traffic can be intercepted on public Wi-Fi or untrusted networks.
• Precise Traffic Routing Control: Configured iptables rules on the Pi to handle NAT and traffic forwarding correctly, making sure VPN client traffic reaches the internet and local network resources as intended.
• Minimal Attack Surface: WireGuard's smaller codebase compared to other VPN protocols, reduces the potential attack surface and improving overall security posture.
• Key-Based Authentication: The server and all clients authenticate using public/private key pairs, removing password-based vulnerabilities from the connection process entirely.
4. Technical Implementation & Workflow
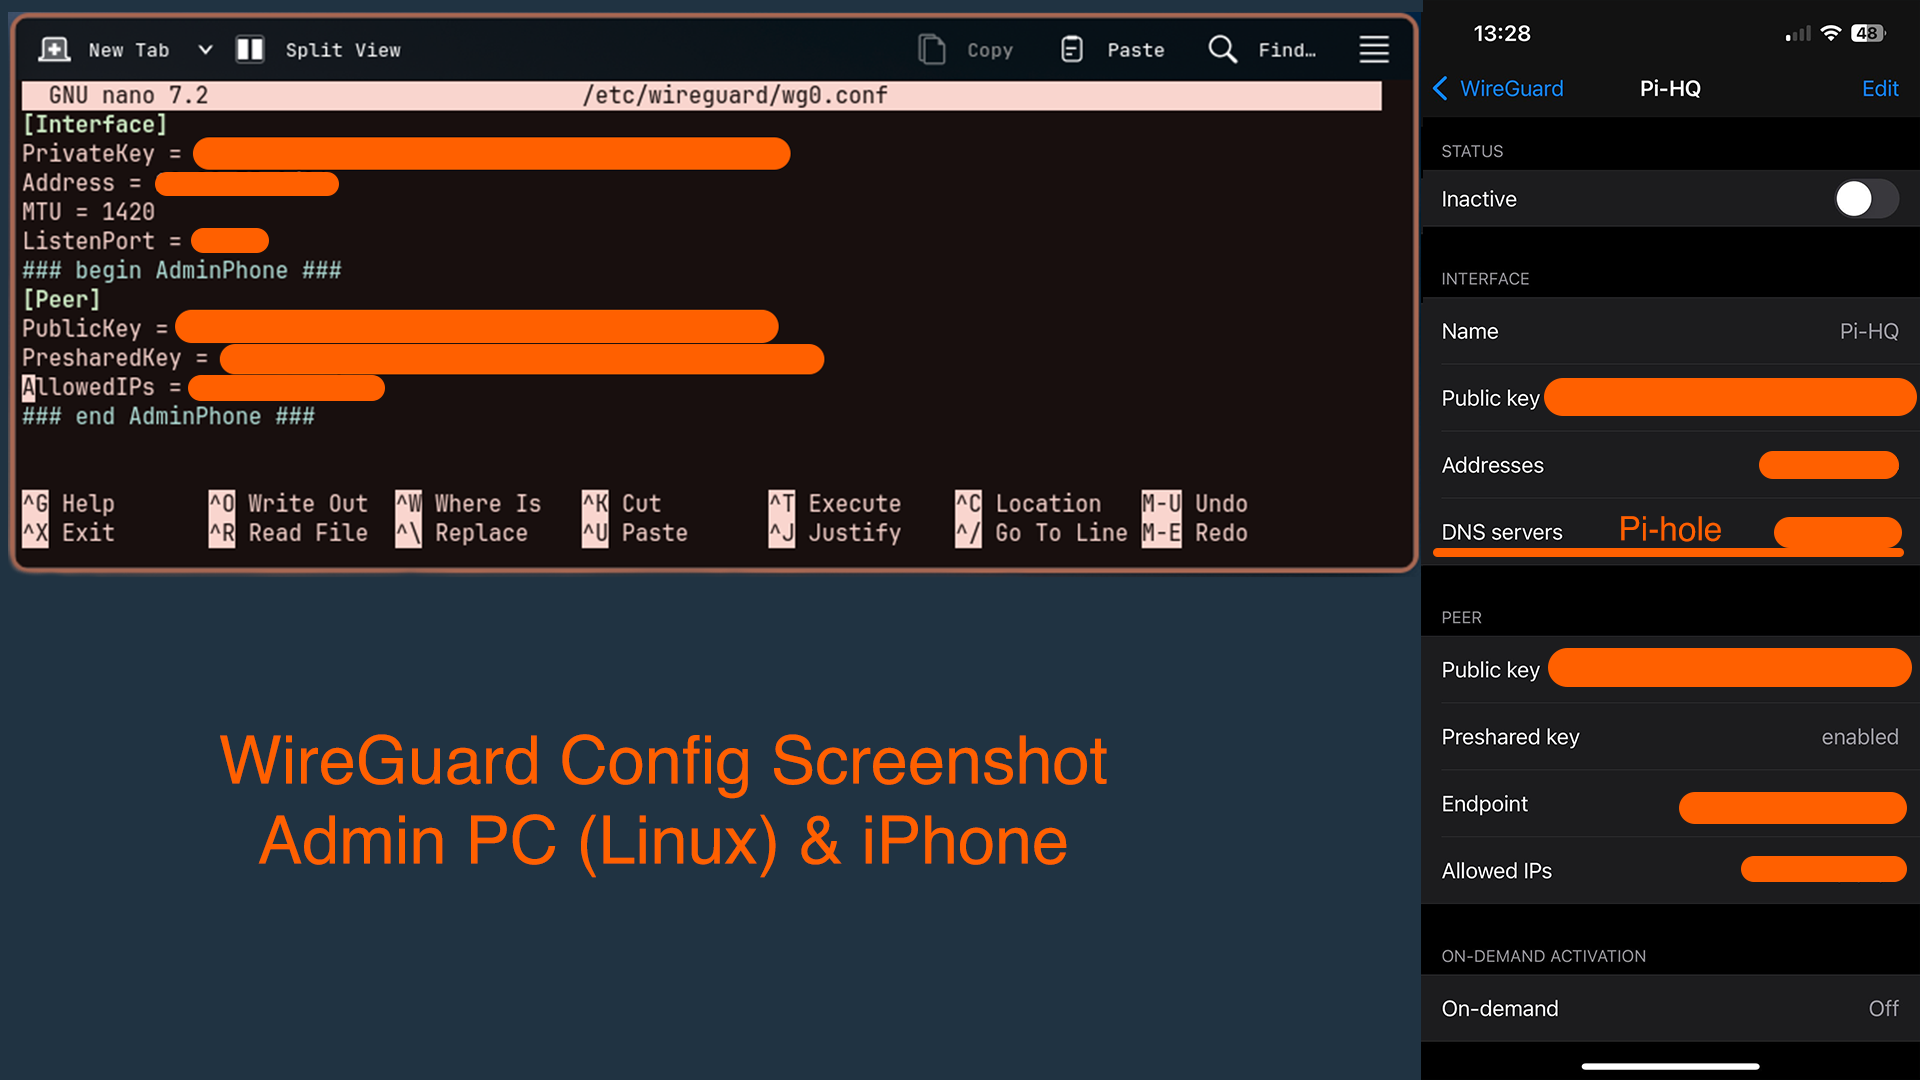
The server runs WireGuard on Raspberry Pi OS Lite. Setup involved generating key pairs for both the server and each client device, then configuring the server's wg0.conf file with its internal IP, listening port (UDP 51820), and the public keys of authorised clients.
From a networking perspective, I enabled IP forwarding and configured iptables for NAT and traffic forwarding. To deal with my home connection's dynamic public IP, I integrated DuckDNS, a script on the Pi periodically updates the DNS record so clients can always reach the server reliably.
Client configurations were generated as QR codes for easy import on iOS and as .conf files for Linux, Windows and macOS. All server administration was done over SSH from my Linux machine.

5. Challenges Faced & Solutions
NAT & Routing Configuration
Getting VPN client traffic to route correctly through the Pi and out to the internet wasn't straightforward. It required carefully setting iptables masquerading rules and enabling IP forwarding at the kernel level. Troubleshooting this gave me a much better practical understanding of how traffic actually moves through a network.
Dynamic Public IP
My home connection doesn't have a static IP, which meant VPN clients couldn't reliably connect to the server's endpoint. Solved this by setting up DuckDNS with an automated update script on the Pi, so the hostname always resolves to the correct IP regardless of when it changes.
Router Port Forwarding
For external clients to reach the WireGuard server, UDP port 51820 needed to be forwarded correctly on my router to the Pi's local IP. Getting this wrong blocks all incoming connections, so it required careful configuration and testing to work.
6. Key Learnings & Skills Gained
This project gave me hands on experience with VPN protocols, Linux networking, NAT configuration, public/private key cryptography, and dynamic DNS. Troubleshooting the routing issues in particular gave me a much better understanding for how traffic flows through a network.
7. Future Enhancements
I want to add a kill switch so that if the VPN tunnel drops, traffic is blocked rather than leaking unencrypted.